
![]() If you’re like me, you may have a domain name that represents you (e.g. berniemichalik.ca) and that domain name is set up with netfirms. You have decided you want that domain name to be your Bluesky handle. Great! Here is the process I followed.
If you’re like me, you may have a domain name that represents you (e.g. berniemichalik.ca) and that domain name is set up with netfirms. You have decided you want that domain name to be your Bluesky handle. Great! Here is the process I followed.
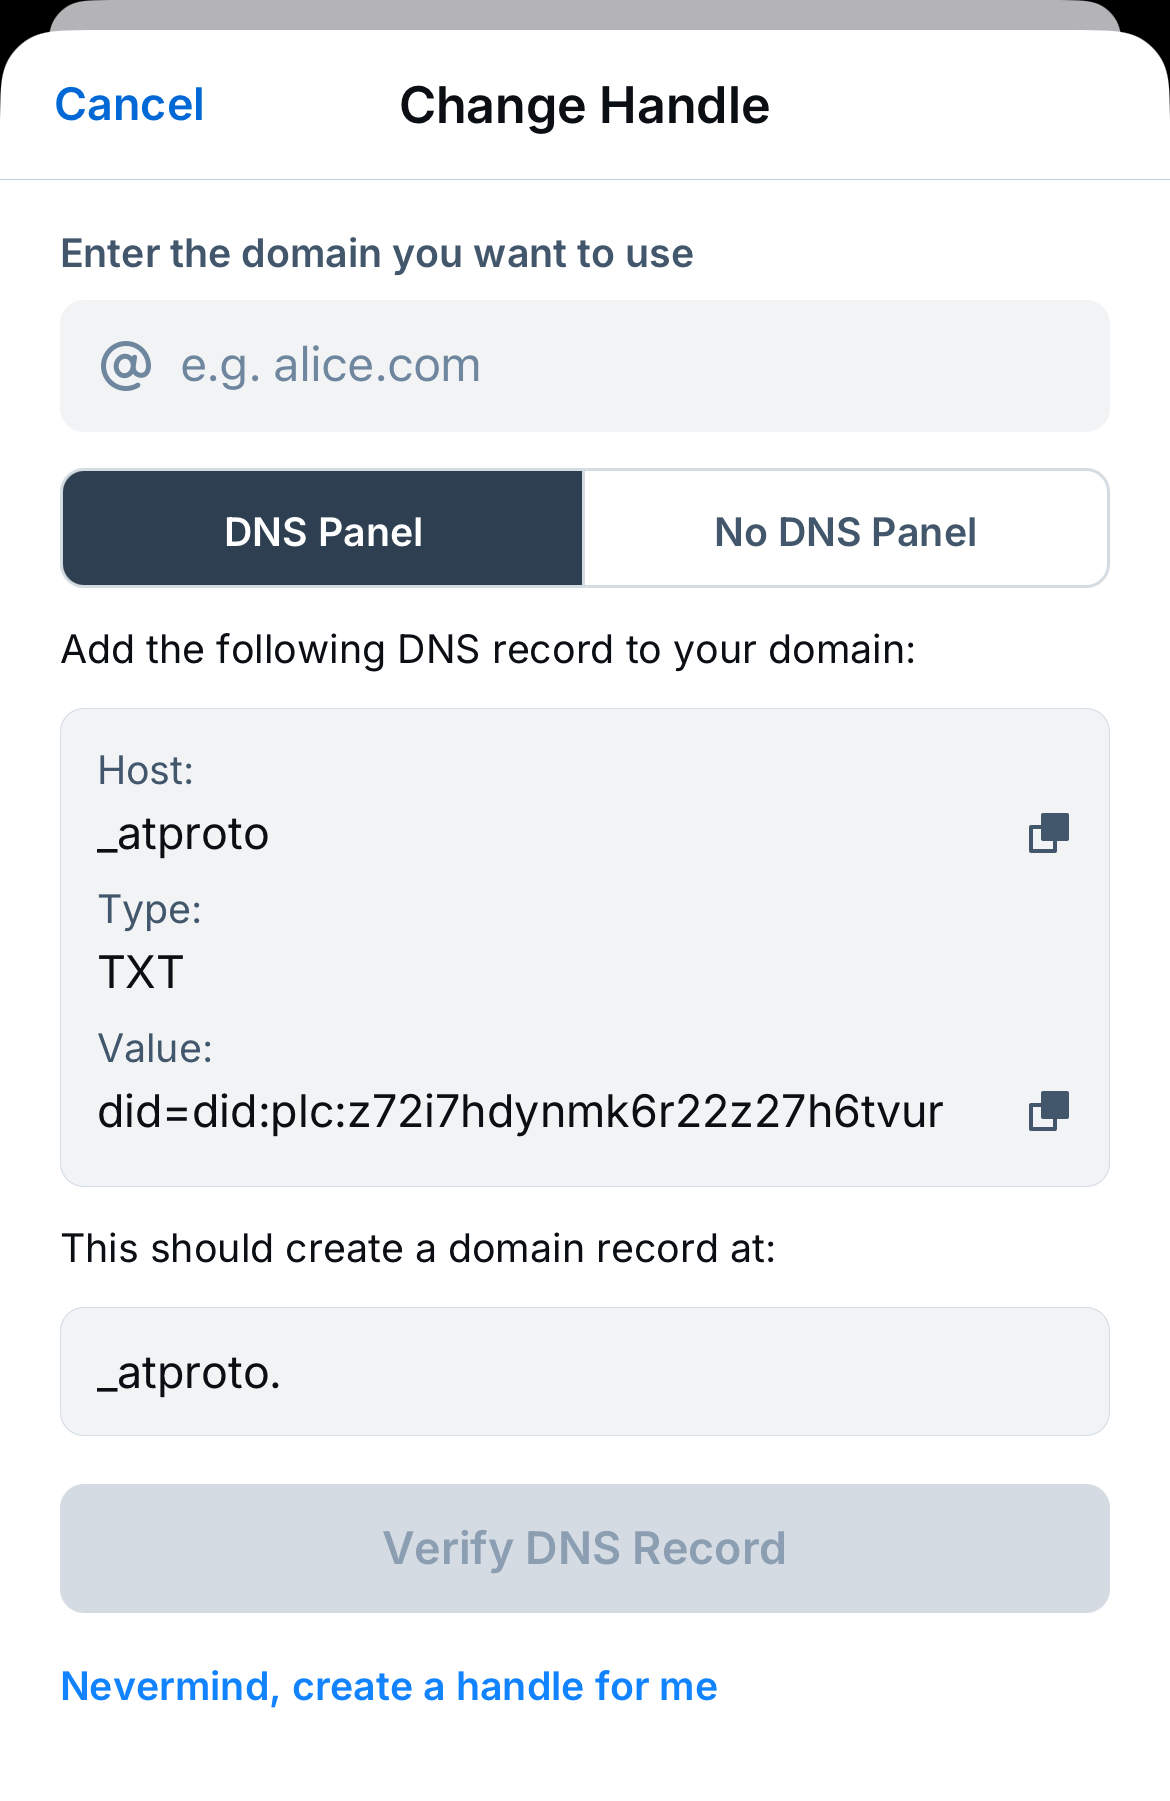
First, you will want to start by following the process outlined by Bluesky here. As you are following their process, you will see a Change Handle screen like the one below. When you get there, write down or save in a file the Host information information (_atproto), Type information (TXT) and the Value information (did=…..). You will need that information when you log in to netfirms.
Once you have that information, you can do the following:
- Login to your netfirms account (https://secure.netfirms.com/secure/login.bml)
- Click on the word Domains at the top left of the screen. Look for the domain name you want to use and then click on the Manage button associated with it.
- Scroll down on the column on the left until you see the words DNS & Nameservers and click on that.
- Look for the words DNS Records and click on that.
- Click on the round button with a plus sign in it to the left of the words Add DNS Record
- A box labelled Add New DNS Record will open. Fill in the input boxes you see.
- For Name, enter the host information: _atproto.
- For Type, it should equal TXT like it does about.
- For Content, enter the value information from Bluesky that started with did=…. (Make sure you enter all the information for the value.)
- For TTL, it should equal 1 hour.
- Once you fill in all this information, click the Add DNS button.
That’s all there is to it! If you follow their process successfully and make the changes in netfirms as I outlined, you will have a new Bluesky handle. Now anyone wanting to verify that your Bluesky account truly is you can check out your web site listed in your handle.
